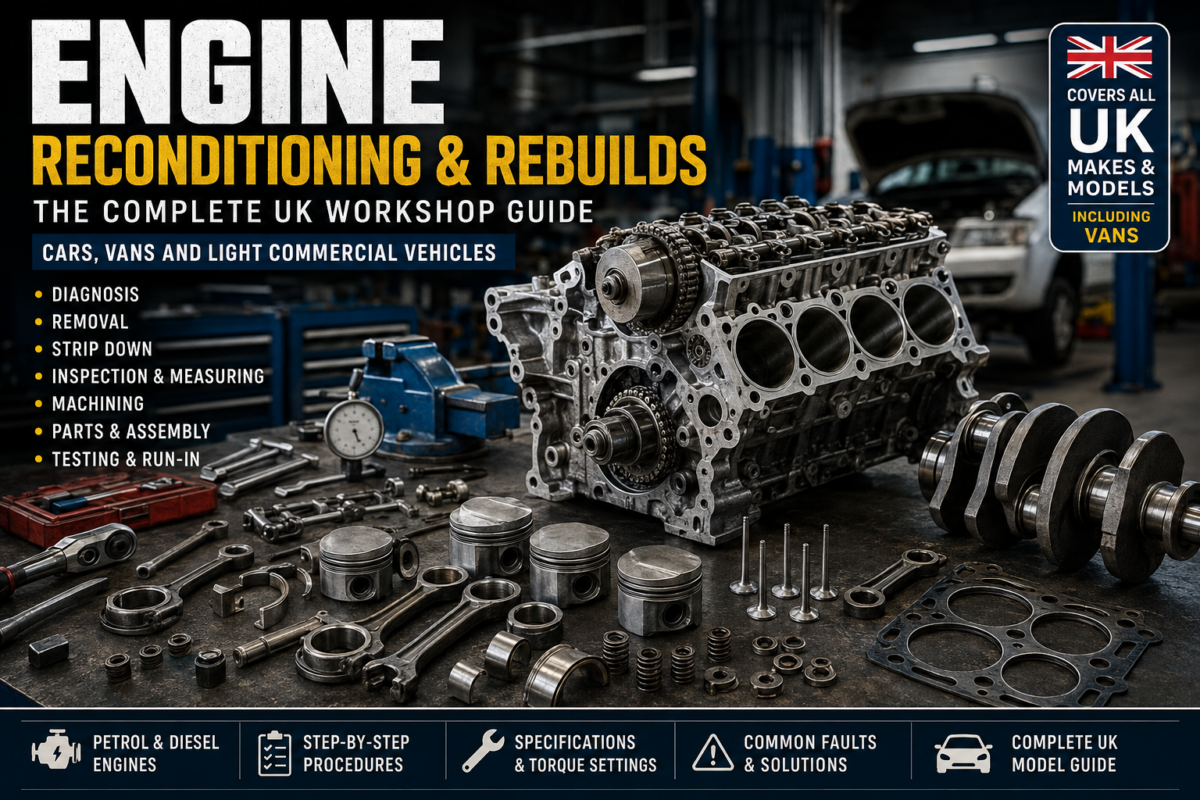
The Complete UK Workshop Guide
Cars, Vans and Light Commercial Vehicles
Chapter 1 – Introduction to Engine Reconditioning
Overview
The internal combustion engine remains one of the most complex mechanical assemblies fitted to modern vehicles. Although manufacturing tolerances have improved dramatically over the past several decades, engines remain subject to wear, contamination, overheating, lubrication failure, fatigue, corrosion and abuse. Eventually every engine reaches a point where simple maintenance is no longer sufficient and a decision must be made between replacement, repair or complete reconditioning.
Engine reconditioning is the process of restoring an engine to serviceable or near-new condition through inspection, machining, replacement of worn components and precise reassembly. Unlike a basic repair, which addresses a single failed component, reconditioning focuses on the entire engine assembly to ensure reliability, efficiency and longevity.
Professional engine rebuilding is a skilled engineering discipline requiring specialist measuring equipment, machining processes and an understanding of metallurgy, lubrication, combustion, heat transfer and mechanical tolerances. Whether rebuilding a small three-cylinder petrol engine, a heavy-duty diesel van engine or a performance V8, the principles remain fundamentally the same.
What Is Engine Reconditioning?
Engine reconditioning involves restoring worn engine components so they perform within the manufacturer’s specified tolerances.
Typical operations include:
- Complete dismantling
- Chemical cleaning
- Crack detection
- Measurement of every critical component
- Machining worn surfaces
- Replacing consumable parts
- Precision reassembly
- Testing
A professionally reconditioned engine should deliver:
- Factory compression
- Correct oil pressure
- Reduced emissions
- Improved fuel economy
- Increased reliability
- Long service life
Engine Rebuild vs Engine Recondition
Many people use the terms interchangeably, but there are subtle differences.
Engine Repair
Repairs involve replacing only failed components.
Examples include:
- Blown head gasket
- Timing belt replacement
- Oil pump replacement
- Broken piston
- Damaged valve
The remainder of the engine may remain untouched.
Get a quote Here for Engine Rebuild
Engine Rebuild
A rebuild normally means the engine is stripped completely.
Wear components are replaced including:
- Pistons
- Rings
- Bearings
- Timing components
- Gaskets
- Seals
Some machining may be carried out.
Engine Reconditioning
Reconditioning goes significantly further.
Every component is inspected, measured and restored wherever possible.
This often includes:
- Cylinder boring
- Honing
- Crankshaft grinding
- Connecting rod resizing
- Cylinder head resurfacing
- Valve seat machining
- Pressure testing
- Dynamic balancing
The objective is to restore the engine as close to factory condition as practical.
Why Engines Wear Out
Every moving engine component experiences friction.
Even with modern synthetic lubricants, microscopic wear occurs every time the engine runs.
Common causes include:
Normal Wear
- Bearing wear
- Ring wear
- Cylinder glazing
- Valve guide wear
Oil Starvation
Often caused by:
- Low oil level
- Oil pump failure
- Blocked pickup strainer
- Incorrect oil grade
Oil starvation rapidly destroys bearings and crankshafts.
Overheating
One severe overheating incident can damage:
- Cylinder head
- Head gasket
- Pistons
- Rings
- Valve seats
Aluminium cylinder heads are particularly vulnerable.
Contamination
Engine oil becomes contaminated by:
- Fuel
- Coolant
- Carbon
- Dirt
- Moisture
Contaminated oil loses its lubricating properties.
Poor Maintenance
Ignoring service schedules dramatically accelerates wear.
Common examples include:
- Missed oil changes
- Dirty air filters
- Incorrect coolant
- Inferior replacement parts
Benefits of Reconditioning
Reconditioning offers significant advantages over purchasing a replacement engine.
Cost
A reconditioned engine is often substantially cheaper than a new factory engine while restoring performance and reliability.
Reliability
Replacing all major wear items greatly reduces the likelihood of repeat failures.
Environmental Impact
Reusing the engine block, crankshaft and other major components reduces waste and the energy required to manufacture new parts.
Originality
For classic vehicles, reconditioning preserves matching engine numbers and originality.
Typical Engine Life
Actual lifespan depends on maintenance, operating conditions and design.
Approximate expectations:
| Engine Type | Typical Life |
|---|---|
| Small petrol | 120,000–180,000 miles |
| Modern turbo petrol | 100,000–180,000 miles |
| Naturally aspirated petrol | 180,000–250,000 miles |
| Light commercial diesel | 200,000–350,000 miles |
| Heavy-duty diesel | 500,000+ miles |
Proper maintenance can significantly extend these figures.
Common Reasons for Rebuild
Typical reasons include:
- Excessive oil consumption
- Low compression
- Bearing knock
- Crankshaft failure
- Broken piston rings
- Overheating damage
- Cambelt belt failure
- Timing chain failure
- Turbocharger failure causing engine damage
- Coolant contamination
- Hydraulic lock
- Seized engine
Types of Engine
Modern UK vehicles use several engine configurations.
Inline Three
Found in many city cars.
Advantages:
- Lightweight
- Efficient
- Compact
Disadvantages:
- Increased vibration
- Higher specific loadings
Inline Four
The most common engine layout.
Suitable for:
- Cars
- Vans
- SUVs
Inline Five
Less common today but used by several manufacturers.
Known for:
- Smooth power delivery
- Distinctive engine note
Inline Six
Highly regarded for refinement.
Common in premium vehicles.
V6
Compact packaging with excellent performance.
V8
Typically found in performance and luxury vehicles.
Boxer
Horizontally opposed cylinders provide a low centre of gravity and good balance.
Diesel Engines
Compression ignition engines remain common in larger cars and commercial vehicles.
Advantages include:
- High torque
- Fuel economy
- Longevity
Petrol Engines
Spark ignition engines are generally lighter, quieter and capable of higher engine speeds.
Hybrid Powertrains
Hybrid vehicles combine an internal combustion engine with electric motors. Although the electric system introduces additional complexity, the petrol engine still requires conventional maintenance and, when necessary, reconditioning.
Workshop Safety
Before any rebuild begins, safety is paramount.
Essential precautions include:
- Wear eye protection when grinding or using compressed air.
- Use suitable gloves when handling chemicals and sharp components.
- Support engines securely with rated stands.
- Disconnect the vehicle battery before engine removal.
- Use calibrated lifting equipment for engine and gearbox assemblies.
- Keep the work area clean to prevent contamination of internal engine parts.
- Follow manufacturer torque specifications and tightening sequences.
- Dispose of waste oil, coolant, filters and solvents in accordance with UK environmental regulations.
Looking Ahead
In the next chapter, we will examine the internal combustion engine in detail, covering engine architecture, component function, lubrication systems, cooling systems, combustion theory, timing systems, and the engineering principles that underpin successful engine reconditioning.
This guide will ultimately include dedicated sections on UK-market passenger cars and vans from major manufacturers, common engine families, known failure points, and rebuild considerations, alongside practical workshop procedures and best practices used by professional engine reconditioning specialists.
Chapter 2 – Engine Construction and Operating Principles
Introduction
Before an engine can be successfully reconditioned, it is essential to understand how it is designed, how each component interacts with the others, and how wear develops over time. Every engine, whether it powers a small city car, a high-performance sports car, or a large commercial van, relies on the same fundamental principles of air, fuel, compression, combustion, and exhaust.
A skilled engine reconditioner does more than replace worn parts—they understand why those parts failed and how to restore the engine to operate within the manufacturer’s original tolerances. This chapter examines the construction and operation of modern petrol and diesel engines, laying the engineering foundation for the practical rebuild procedures covered later in this guide.
The Four-Stroke Cycle
Most road vehicles in the UK use a four-stroke internal combustion engine. Each cylinder completes four distinct strokes during two complete revolutions of the crankshaft.
1. Intake Stroke
The intake valve opens while the piston travels downward from Top Dead Centre (TDC) to Bottom Dead Centre (BDC). This movement creates a pressure difference that draws air into the cylinder. In petrol engines, the incoming air is typically mixed with fuel before or during entry. In diesel engines, only air enters the cylinder at this stage.
2. Compression Stroke
With both valves closed, the piston rises toward TDC, compressing the cylinder contents. Compression increases temperature and pressure, preparing the charge for ignition. High compression is critical for diesel engines, where fuel ignites from heat generated during compression alone.
3. Power Stroke
Near TDC, combustion begins. In petrol engines, a spark plug initiates ignition. In diesel engines, fuel is injected into the hot compressed air, causing spontaneous ignition. The resulting expansion forces the piston downward, delivering useful mechanical work to the crankshaft.
4. Exhaust Stroke
The exhaust valve opens as the piston rises again, expelling combustion gases from the cylinder. The cycle then repeats.
Understanding Compression Ratio
Compression ratio is the ratio between the cylinder volume when the piston is at BDC and the remaining combustion chamber volume when the piston reaches TDC.
Typical values:
| Engine Type | Compression Ratio |
|---|---|
| Naturally aspirated petrol | 9:1–12:1 |
| Turbocharged petrol | 8:1–10.5:1 |
| Diesel | 14:1–22:1 |
Higher compression generally improves efficiency but increases mechanical and thermal stress.
Cylinder Block
The cylinder block is the structural backbone of the engine. It supports the crankshaft, contains the cylinders, and provides oil and coolant passages.
Materials
Cast Iron
Advantages:
- Excellent wear resistance
- High rigidity
- Easily machined
- Durable under heavy loads
Disadvantages:
- Heavy
- Lower thermal conductivity
Aluminium Alloy
Advantages:
- Lightweight
- Excellent heat dissipation
- Improved fuel economy
Disadvantages:
- Softer material
- Greater thermal expansion
- More susceptible to distortion when overheated
Many aluminium blocks use cast iron or plasma-coated cylinder liners to improve wear resistance.
Cylinder Liners
Cylinder liners provide the surface against which piston rings operate.
Dry Liners
Pressed directly into the engine block and surrounded by the block material. They are common in smaller engines and are not in direct contact with coolant.
Wet Liners
Supported by the block but surrounded by engine coolant. Wet liners are easier to replace and are often found in heavy-duty diesel engines and commercial vehicles.
Pistons
The piston converts combustion pressure into mechanical movement.
Modern pistons are typically manufactured from aluminium alloys for strength and reduced weight.
Each piston consists of:
- Crown
- Ring grooves
- Pin bosses
- Skirt
Crown
The crown forms part of the combustion chamber and may be flat, domed, or dished depending on engine design.
Ring Grooves
Machined grooves hold the piston rings. Wear in these grooves can lead to excessive oil consumption and poor sealing.
Skirt
The skirt guides the piston within the cylinder and reduces rocking during operation.
Piston Rings
Each piston usually carries three rings.
Top Compression Ring
Provides the primary combustion seal.
Second Compression Ring
Assists sealing and helps scrape excess oil from the cylinder wall.
Oil Control Ring
Regulates oil film thickness on the cylinder wall, preventing excessive oil from entering the combustion chamber.
Worn or damaged rings can cause:
- Low compression
- Excessive oil consumption
- Blue exhaust smoke
- Increased crankcase pressure
Gudgeon Pin (Wrist Pin)
The gudgeon pin connects the piston to the connecting rod, allowing the piston to pivot as the rod changes angle during crankshaft rotation.
Pins may be:
- Press-fit
- Fully floating
- Semi-floating
Connecting Rods
The connecting rod transfers piston force to the crankshaft.
A connecting rod comprises:
- Small end
- Beam
- Big end
- Bearing cap
The big end rotates on bearing shells, while the small end houses the gudgeon pin.
Connecting rods must be:
- Straight
- Correctly aligned
- Free from cracks
- Within manufacturer weight tolerance
Crankshaft
The crankshaft converts reciprocating piston movement into rotational motion.
Major components include:
- Main journals
- Big-end journals
- Counterweights
- Oil drillings
- Flywheel flange
- Front pulley mounting
The crankshaft rotates within precision main bearings and is lubricated by pressurised engine oil.
Bearings
Engine bearings are sacrificial components designed to wear before the crankshaft.
Typical bearing construction:
- Steel backing
- Copper layer
- Lead/tin overlay
- Anti-friction surface coating
Bearing failure is commonly caused by:
- Oil starvation
- Contamination
- Overheating
- Incorrect clearances
- Excessive loading
Flywheel
The flywheel smooths engine rotation by storing rotational energy between power strokes.
Functions include:
- Stabilising crankshaft speed
- Supporting the clutch
- Providing starter motor engagement
- Damping torsional vibration
Many modern diesel engines use dual-mass flywheels (DMFs) to reduce drivetrain vibration.
Camshaft
The camshaft controls valve timing.
Lobes on the camshaft open intake and exhaust valves in precise synchronisation with crankshaft rotation.
Common configurations:
- OHV (Overhead Valve)
- SOHC (Single Overhead Camshaft)
- DOHC (Double Overhead Camshaft)
Many modern engines also feature variable valve timing systems.
Valves
Each cylinder typically contains:
- One or two intake valves
- One or two exhaust valves
Valve materials differ because exhaust valves operate at much higher temperatures than intake valves.
Valve failures include:
- Burning
- Bending
- Sticking
- Recession
- Stem wear
Valve Springs
Valve springs ensure valves close quickly and maintain contact with the camshaft or rocker mechanism.
Weak springs can cause valve float at high engine speeds, reducing performance and risking mechanical damage.
Cylinder Head
The cylinder head seals the combustion chambers and contains:
- Combustion chambers
- Valve seats
- Valve guides
- Camshafts (on OHC engines)
- Coolant passages
- Oil galleries
- Spark plugs or injectors
Aluminium heads are now standard on most passenger vehicles due to their reduced weight and improved heat transfer.
Head Gasket
The head gasket seals:
- Combustion pressure
- Oil passages
- Coolant passages
Failure can result in:
- Coolant loss
- Oil contamination
- Overheating
- White exhaust smoke
- Compression loss
Lubrication System
Engine oil performs several critical functions:
- Lubrication
- Cooling
- Cleaning
- Corrosion protection
- Hydraulic operation
- Sealing
Major lubrication components include:
- Oil pump
- Pickup strainer
- Pressure relief valve
- Oil filter
- Oil galleries
- Sump
Modern oils contain additives to improve viscosity stability, reduce wear, prevent oxidation, and keep contaminants suspended until filtration.
Cooling System
The cooling system maintains the engine within its designed operating temperature range.
Main components include:
- Radiator
- Water pump
- Thermostat
- Cooling fan
- Expansion tank
- Coolant passages
Insufficient cooling can lead to warped cylinder heads, blown head gaskets, piston seizure, and accelerated oil degradation.
Fuel Systems
Petrol Engines
Modern petrol engines generally use electronic fuel injection, delivering fuel precisely under the control of the engine management system.
Diesel Engines
Diesel engines rely on high-pressure injection systems, often exceeding 2,000 bar, to atomise fuel directly into the combustion chamber.
Ignition System
Petrol engines require a high-voltage ignition system consisting of:
- Battery
- Engine Control Unit (ECU)
- Ignition coils
- Spark plugs
- Crankshaft position sensor
- Camshaft position sensor
Correct ignition timing is essential for performance, emissions, and engine longevity.
Turbochargers
Many modern engines use turbochargers to increase power and efficiency by compressing the intake air.
Advantages:
- Increased torque
- Improved fuel economy
- Reduced emissions
- Higher specific power output
Turbochargers depend on clean, high-quality engine oil. Oil starvation or contamination can rapidly destroy the bearings.
Common Wear Points
During an engine rebuild, particular attention should be paid to components that experience the greatest mechanical and thermal stress:
- Cylinder bores
- Piston rings
- Main bearings
- Big-end bearings
- Camshaft lobes
- Valve guides
- Valve seats
- Timing chains and tensioners
- Oil pumps
- Turbocharger bearings (where fitted)
Accurate measurement of these components is essential to determine whether they can be reused, require machining, or must be replaced.
Chapter 3 – Diagnosing Engine Failures Before Rebuilding
Introduction
Accurate diagnosis is the foundation of every successful engine rebuild. Dismantling an engine without first identifying the root cause of its failure can lead to unnecessary parts replacement, missed faults, increased costs, and repeated failures after reassembly.
Professional engine reconditioners follow a structured diagnostic process that combines customer feedback, visual inspection, electronic diagnostics, mechanical testing, and performance measurements. The goal is not simply to identify what has failed, but to understand why it failed and whether the damage is isolated or systemic.
Step 1 – Customer Interview
If the engine is still in the vehicle, begin by gathering as much information as possible.
Useful questions include:
- When did the fault first appear?
- Was the failure sudden or gradual?
- Has the engine overheated?
- Has the oil warning light illuminated?
- Has coolant been lost recently?
- Has the timing belt or chain ever been replaced?
- Is the engine consuming oil?
- Is there excessive exhaust smoke?
- Has the vehicle lost power?
- Are there unusual noises during cold starts or under load?
- Has any previous engine work been carried out?
This information helps narrow the investigation before any tools are used.
Step 2 – Initial Visual Inspection
Before starting the engine or dismantling components, carry out a thorough visual inspection.
Check for:
- Oil leaks
- Coolant leaks
- Fuel leaks
- Damaged wiring
- Loose hoses
- Broken engine mounts
- Signs of overheating (discoloured paint, melted plastics)
- Contaminated coolant
- Milky oil indicating coolant contamination
- Excessive sludge beneath the oil filler cap
- Damaged auxiliary belts
- Missing or incorrect fasteners
A careful inspection often reveals clues that save hours of diagnostic time.
Step 3 – Electronic Diagnostics
Modern engines rely on electronic control systems. Before dismantling, scan the vehicle with a suitable diagnostic tool.
Common areas to investigate include:
- Engine Control Unit (ECU) fault codes
- Live sensor data
- Fuel trim values
- Misfire counts
- Coolant temperature readings
- Intake air temperature
- Manifold pressure
- Crankshaft and camshaft correlation
- Injector correction values (diesel)
- Turbocharger boost pressure
- Exhaust gas recirculation (EGR) operation
- Diesel particulate filter (DPF) status
Electronic faults do not always indicate mechanical failure, but they provide valuable context.
Step 4 – Fluid Inspection
Engine Oil
Inspect the oil for:
- Metallic particles
- Copper or bronze flakes (bearing wear)
- Aluminium particles (piston or block damage)
- Water contamination
- Fuel dilution
- Burnt smell
- Excessive sludge
Cutting open the oil filter can reveal trapped metal debris that is not visible in the drained oil.
Coolant
Inspect for:
- Oil contamination
- Rust
- Scale
- Combustion gases
- Incorrect coolant type
- Floating debris
Oil in the coolant may indicate a failed head gasket, cracked cylinder head, or damaged oil cooler.
Step 5 – Listen to the Engine
Many faults can be identified by sound.
Deep Knocking
Usually indicates:
- Main bearing wear
- Big-end bearing failure
Light Metallic Knock
Possible causes:
- Piston slap
- Worn gudgeon pin
- Connecting rod wear
Ticking Noise
Often caused by:
- Hydraulic lifters
- Valve clearance issues
- Camshaft wear
Rattle at Start-up
Commonly associated with:
- Timing chain stretch
- Worn tensioners
- Variable valve timing mechanisms
Whining
May indicate:
- Oil pump wear
- Water pump failure
- Turbocharger bearing damage
Use a mechanic’s stethoscope to isolate the source of unusual noises.
Step 6 – Compression Testing
Compression testing evaluates the sealing ability of each cylinder.
Procedure
- Warm the engine to operating temperature (if safe).
- Disable ignition and fuel systems.
- Remove all spark plugs or glow plugs.
- Install a compression gauge.
- Fully open the throttle.
- Crank the engine for several revolutions.
- Record each cylinder’s reading.
Uniform readings across all cylinders are often more important than the absolute pressure value.
Low compression may result from:
- Worn piston rings
- Burnt valves
- Blown head gasket
- Cracked cylinder head
- Cracked piston
- Excessive cylinder wear
Wet Compression Test
If a cylinder shows low compression:
- Add a small amount of clean engine oil into the cylinder.
- Repeat the test.
Compression Increases
Likely cause:
- Worn piston rings
- Worn cylinder bore
Compression Unchanged
Likely cause:
- Valve leakage
- Head gasket failure
- Cracked head
Leak-Down Testing
A leak-down test is more precise than a compression test.
Compressed air is introduced into a cylinder at TDC on the compression stroke, and the percentage of leakage is measured.
Listening for escaping air helps identify the fault:
- Intake manifold – leaking intake valve
- Exhaust pipe – leaking exhaust valve
- Oil filler cap – worn rings or damaged piston
- Radiator – head gasket or cracked head
- Adjacent spark plug hole – head gasket failure between cylinders
Oil Pressure Testing
Low oil pressure can indicate:
- Worn bearings
- Oil pump wear
- Blocked pickup strainer
- Excessive bearing clearances
- Pressure relief valve faults
Install a calibrated mechanical pressure gauge in place of the oil pressure sender and compare readings with manufacturer specifications at idle and higher engine speeds.
Cooling System Pressure Test
A pressure tester can reveal:
- External coolant leaks
- Head gasket failures
- Cracked cylinder heads
- Cracked engine blocks
- Faulty radiator caps
Maintain the specified pressure and observe for any drop over time.
Chemical Test for Combustion Gases
A combustion leak tester detects exhaust gases in the cooling system.
Positive results indicate:
- Blown head gasket
- Cracked cylinder head
- Cracked block
This test is particularly useful when overheating is intermittent.
Exhaust Smoke Diagnosis
Exhaust colour provides valuable clues.
Blue Smoke
Indicates oil entering the combustion chamber.
Possible causes:
- Worn piston rings
- Valve guide wear
- Turbocharger oil seal failure
- Excessive bore wear
White Smoke
Often indicates coolant entering the cylinders.
Possible causes:
- Blown head gasket
- Cracked cylinder head
- Cracked engine block
A small amount of white vapour during cold starts can be normal condensation.
Black Smoke
Indicates excessive fuel or insufficient air.
Potential causes:
- Faulty injectors
- Air intake restrictions
- Turbocharger faults
- Incorrect sensor readings
Spark Plug Inspection (Petrol Engines)
Spark plugs act as a window into combustion conditions.
| Appearance | Possible Cause |
|---|---|
| Light brown | Normal combustion |
| Black and dry | Rich fuel mixture |
| Black and oily | Oil burning |
| White | Lean mixture or overheating |
| Damaged electrode | Detonation or foreign object damage |
Glow Plug Inspection (Diesel Engines)
Faulty glow plugs can indicate:
- Excessive carbon build-up
- Injector spray issues
- Overheating
- Combustion abnormalities
Bore Inspection with an Endoscope
A borescope allows internal inspection without dismantling.
Look for:
- Vertical scoring
- Cylinder glazing
- Carbon deposits
- Coolant contamination
- Cracked pistons
- Foreign object damage
- Valve damage
This can help determine whether a full strip-down is necessary.
Bearing Failure Analysis
When metallic debris is present, examine bearing material closely.
| Bearing Appearance | Likely Cause |
|---|---|
| Copper showing | Overlay worn away |
| Deep scoring | Dirt contamination |
| Blue discoloration | Overheating |
| Wiped surface | Oil starvation |
| Fatigue cracking | Excessive load or misalignment |
Understanding the failure mode helps prevent recurrence.
Turbocharger Assessment
Before condemning an engine, inspect the turbocharger.
Check:
- Shaft play
- Oil leaks
- Compressor wheel damage
- Turbine damage
- Carbon deposits
- Wastegate operation
- Variable vane movement (where fitted)
Turbocharger failure can mimic engine faults and vice versa.
Timing System Checks
Inspect timing components for:
- Belt cracking
- Belt contamination
- Chain elongation
- Worn guides
- Weak tensioners
- Incorrect timing alignment
A slipped timing belt or stretched chain can produce poor running, low compression, or piston-to-valve contact.
Deciding on the Repair Strategy
After completing all tests, determine the most appropriate course of action.
Minor Repair
Suitable when damage is isolated, such as a leaking gasket or a faulty oil pump, and the rest of the engine remains within specification.
Engine Rebuild
Appropriate if wear is confined to specific components, for example replacing piston rings, bearings, and timing components while reusing serviceable major parts.
Full Reconditioning
Recommended when there is widespread wear, significant overheating damage, oil starvation, or high mileage. This involves complete disassembly, machining, thorough inspection, replacement of all wear components, and precision reassembly.
Replacement Engine
In some cases, extensive block damage, severe cracking, or uneconomical repair costs may make replacing the engine more practical than rebuilding it.
Diagnostic Checklist
Before removing the engine, confirm that you have:
Recorded all findings for reference during the rebuild.
Interviewed the customer or reviewed the service history.
Performed a visual inspection.
Scanned for electronic fault codes.
Checked engine oil and coolant condition.
Listened for abnormal noises.
Completed compression and, where appropriate, leak-down testing.
Measured oil pressure.
Pressure-tested the cooling system.
Inspected spark or glow plugs.
Assessed the timing system.
Examined the turbocharger if fitted.
Ford Transit and Ranger Engine Rebuilds provide a practical route for owners whose van or pickup has suffered internal engine wear, timing failure, overheating, oil-pressure loss, piston damage or another serious mechanical fault.
Ford Transit and Ranger Engine Rebuilds for All Models
Our approach to Ford Transit and Ranger Engine Rebuilds begins with identifying the vehicle correctly. A Transit panel van used for multidrop deliveries may require a different inspection strategy from a Ranger double cab that regularly tows, travels off-road or carries heavy equipment. The registration, VIN, production year, engine identification and existing symptoms should therefore be checked before parts or machining work is authorised.
Ford Transit and Ranger Engine Rebuilds may be suitable when the original engine remains recoverable but has sustained damage that cannot be corrected through ordinary servicing. Rebuilding can involve stripping the unit, measuring its internal components, machining reusable parts and replacing damaged items before careful reassembly and testing.
Drivers can also explore our main engine rebuild service, dedicated Ford Transit engine rebuilds and model-specific Ford Ranger engine rebuilds.
Ford Transit Models and Generations Covered
Ford Transit and Ranger Engine Rebuilds cover a broad commercial-vehicle history. The Ford Transit has been produced since 1965 and has appeared as a panel van, minibus, crew van, chassis cab, dropside, tipper, box body, Luton conversion, camper base and specialist vehicle.
Early UK Transits used petrol and diesel engines including Essex V4 and V6 units, Pinto petrol engines, York diesels and the later 2.5-litre direct-injection diesel. As vehicles of this age may have been modified, an older Transit should be identified from the physical engine and vehicle records rather than assumptions based only on its registration year.
The 1986–2000 Transit family retained numerous short-wheelbase, long-wheelbase, minibus and chassis variants. Diesel applications included naturally aspirated and turbocharged versions of Ford’s 2.5 DI engine. These engines are mechanically different from the later common-rail units, so Ford Transit and Ranger Engine Rebuilds must be planned around the actual generation.
The 2000–2006 Transit introduced the Duratorq family across front-wheel-drive and rear-wheel-drive layouts. Depending on market, year and configuration, this period included 2.0 and 2.4-litre TDDi or TDCi engines. The 2006–2014 facelifted range continued with Duratorq diesel engines and later added the 2.2-litre TDCi.
The full-size Transit launched for 2014 used 2.2-litre TDCi engines initially, followed in the UK by 2.0-litre EcoBlue diesel engines. Current configurations include panel vans, double-cab vans, chassis cabs and conversions in multiple lengths and roof heights. Buyers comparing smaller Ford vans can visit our pages for Transit Custom engine rebuilds and Transit Courier engine rebuilds.
Ford Transit and Ranger Engine Rebuilds do not apply to the fully electric E-Transit traction motor in the same way as an internal-combustion engine rebuild. Hybrid or electrified models also require accurate diagnosis because a drivability fault may arise outside the combustion engine.
Ford Ranger Models and Generations Covered
Ford Transit and Ranger Engine Rebuilds also support UK Ford Ranger pickups across single-cab, Super Cab, double-cab and chassis-cab formats. Ranger usage commonly includes towing, construction, agriculture, forestry, utilities, property maintenance and recreational off-road driving.
Earlier UK Rangers were related to Mazda-designed pickups and were sold with diesel engines including 2.5-litre units. Later PJ and PK Rangers used 2.5 and 3.0-litre TDCi diesel engines in relevant versions. Because specification varies by production date and market, the engine label, VIN and casting identification should be checked before ordering components.
The T6 Ranger introduced in the UK from 2011 included 2.2-litre four-cylinder and 3.2-litre five-cylinder Duratorq TDCi diesel engines. Variants included XL, XLT, Limited and Wildtrak, with drivetrain and output differences across the range.
Later Rangers adopted 2.0-litre EcoBlue diesel engines in single-turbo and bi-turbo forms, while some versions retained the 3.2-litre diesel for a period. The current Ranger generation includes 2.0-litre diesel, 3.0-litre V6 diesel and high-performance Raptor derivatives, depending on model and year. The exact engine must be established before Ford Transit and Ranger Engine Rebuilds commence.
Owners comparing pickup-engine work can also read about Volkswagen Amarok engine rebuilds, particularly because recent Ranger and Amarok models share some underlying vehicle architecture. This does not mean their engines or calibrations should be treated as automatically interchangeable.
Verified Engine Identification
Ford Transit and Ranger Engine Rebuilds should never be based on a guessed engine code. Ford has used many codes and revisions across different years, emissions levels, power outputs and driveline arrangements. Codes associated with Transit and Ranger applications can include Duratorq families such as Puma and later Panther/EcoBlue units, but a family name alone is not sufficient for parts selection.
Useful identification evidence includes:
- Vehicle identification number and registration data
- Engine label, stamped number or block identification
- Production month and model year
- Front-, rear- or four-wheel-drive configuration
- Manual or automatic transmission
- Declared power output and emissions standard
- Photographs of the installed engine and ancillaries
Ford Transit and Ranger Engine Rebuilds should use this information to match pistons, rings, bearings, gaskets, timing components and other parts to the installed unit. Ford’s official Transit information and Ranger information provide useful current-range context, while the Transit model history and Ranger model history give broader generation overviews.
Common Transit and Ranger Engine Problems
Ford Transit and Ranger Engine Rebuilds may follow warning signs such as persistent knocking, low oil pressure, blue exhaust smoke, excessive crankcase pressure, coolant loss, repeated overheating, difficult starting, uneven compression, metal contamination in the oil or abnormal timing noise.
Timing-system damage
Timing belt, chain, tensioner, guide or lubrication problems can allow valve timing to move out of specification. On an interference engine, a major timing failure may bend valves, damage pistons or harm the cylinder head. Ford Transit and Ranger Engine Rebuilds should therefore include a complete examination of the timing drive rather than replacement of one visibly damaged component.
Oil starvation and bearing wear
Low oil level, unsuitable oil, restricted oil flow, pump problems, extended service intervals or contamination may damage crankshaft journals, connecting-rod bearings, camshafts and turbocharger bearings. A replacement turbo alone may fail again when the underlying lubrication problem remains.
Overheating and cylinder-head faults
Coolant loss, restricted circulation, radiator issues, thermostat faults, hose failure or combustion-gas leakage can lead to overheating. The cylinder head may distort or crack, while the gasket sealing faces can deteriorate. Ford Transit and Ranger Engine Rebuilds require measurement and pressure testing where heat damage is suspected.
Injector and combustion problems
Incorrect fuelling, poor injector spray patterns or sealing problems can contribute to rough running, piston damage, bore wear or excessive exhaust smoke. Diagnostic data and injector testing help distinguish an internal engine defect from a fuel-system fault.
DPF, EGR and turbocharger symptoms
A blocked diesel particulate filter, malfunctioning EGR system, boost leak or turbocharger fault may produce reduced power and warning lights without proving that the base engine needs rebuilding. Ford Transit and Ranger Engine Rebuilds should proceed only after the complete fault chain has been assessed.
What the Rebuild Process Can Include
Ford Transit and Ranger Engine Rebuilds normally begin with external inspection, diagnostic checks and an assessment of oil and coolant condition. Where internal failure is confirmed, the engine is removed and stripped in a controlled sequence.
| Stage | Typical work |
|---|---|
| Inspection | Check block, cylinder head, crankshaft, pistons, rods, bearings, valves and timing parts. |
| Measurement | Measure bores, journals, clearances, flatness and reusable-component tolerances. |
| Machining | Machine or recondition serviceable components where technically appropriate. |
| Parts replacement | Replace damaged or out-of-tolerance bearings, rings, seals, gaskets and associated components. |
| Assembly | Reassemble clean components using the correct sequences, settings and lubrication procedures. |
| Testing | Verify oil pressure, cooling operation, compression, running quality and fault-code status. |
Ford Transit and Ranger Engine Rebuilds are not identical in every case. A lightly worn engine may remain suitable for machining and standard replacement components, while a unit with a cracked block, severely damaged crankshaft or extensive overheating may require additional parts or a different repair strategy.
Repair, Rebuild or Replacement?
A localised repair can be sensible when damage is genuinely confined to a serviceable cylinder head, timing system or ancillary component. A rebuild is more appropriate when wear or failure affects the engine’s internal rotating or sealing components. Replacement may be considered when the original unit is beyond economical or technical recovery.
Ford Transit and Ranger Engine Rebuilds can offer an advantage where retention of the original block and engine identity is possible. However, the decision should follow dismantling and measurement, not a blanket claim that every failed engine can be recovered.
Commercial-vehicle owners researching alternatives may also find our pages on VW Crafter engine rebuilds, VW Transporter engine rebuilds, VW Caddy engine rebuilds, Citroën Relay engine rebuilds and Citroën Dispatch engine rebuilds useful.
UK Coverage for Working Vans and Pickups
Enquiries about Ford Transit and Ranger Engine Rebuilds may come from tradespeople, fleets and private owners across London, Birmingham, Manchester, Liverpool, Leeds, Sheffield, Bristol, Nottingham, Leicester and Coventry.
We also receive enquiries involving vehicles based around Newcastle, Sunderland, Middlesbrough, York, Hull, Bradford, Huddersfield, Harrogate, Doncaster and Wakefield. Location coverage must not be confused with a claim that a physical workshop operates in each town.
Ford Transit and Ranger Engine Rebuilds may also be considered by owners in Norwich, Cambridge, Peterborough, Oxford, Milton Keynes, Northampton, Reading, Swindon, Gloucester and Worcester.
Further enquiries can involve Southampton, Portsmouth, Brighton, Eastbourne, Bournemouth, Exeter, Plymouth, Cardiff, Swansea, Newport, Edinburgh, Glasgow, Aberdeen, Dundee, Perth, Stirling, Belfast and Londonderry. Vehicle collection, delivery and booking arrangements should always be confirmed for the individual postcode.
Related Engine Rebuild Information
Although this page focuses on Ford Transit and Ranger Engine Rebuilds, owners managing mixed fleets may need information on other vehicle types. Relevant guides include Audi A3 engine rebuilds, Audi A4 engine rebuilds, Audi A5 engine rebuilds and Audi A6 engine rebuilds.
Additional resources cover Audi Q2 engine rebuilds, Audi Q3 engine rebuilds, Audi Q5 engine rebuilds and Audi TT engine rebuilds. Website data handling is explained in the privacy policy.
Request an Assessment
Before arranging Ford Transit and Ranger Engine Rebuilds, provide the registration, mileage, model year, engine size, known engine code, transmission type and a clear description of the failure. Mention whether the vehicle still starts, whether it overheated, whether the timing system failed and whether another garage has already dismantled any components.
Ford Transit and Ranger Engine Rebuilds should be quoted only after the available evidence has been reviewed. Initial estimates may need revision if dismantling exposes hidden crankshaft, cylinder-block, piston, connecting-rod or cylinder-head damage.
For a Transit van that supports daily deliveries or a Ranger pickup used for towing and site work, dependable diagnosis matters as much as the rebuild itself. Properly planned Ford Transit and Ranger Engine Rebuilds address the cause of failure, restore the engine using suitable parts and machining, and reduce the risk of a repaired unit being damaged again by an unresolved ancillary fault.
Contact the team with the vehicle details to discuss whether Ford Transit and Ranger Engine Rebuilds, a targeted repair or another engine solution is appropriate.